Geodesic domes
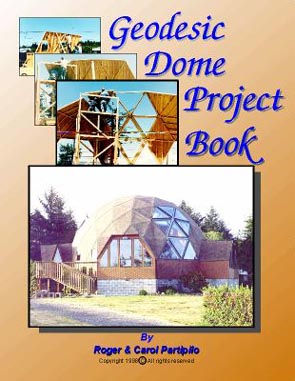
Geodesic domes have been a fascinating topic ever since reading a book about them as a child. Their space savings structure encloses a large area with a minimum of materials. Other advantages of domes include strength, wind resistance, ample room for skylights, and their overall aesthetics. The name of the book is not clear, but it could have been the Geodesic Dome Project Book at right. The book demonstrated several construction methods that may prove useful for translating this dream into reality.
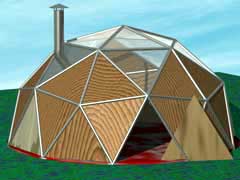
How are domes designed? The inventor, Walther Bauersfeld, started with a platonic solid, such as the 20-sided icosahedron. The process of subdividing the edges and bringing the center points out to form the dome's iconic spherical structure is called tesselation. R. Buckminster Fuller coined the term, "geodesic" and patented the related formulas that helped popularize the design. These days we don't have to know geodesic mathematics as many graphic design programs can calculate the strut lengths for us.
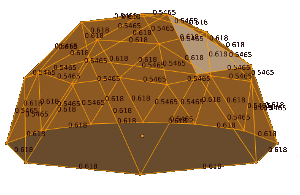
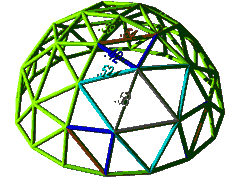
The above dome design came together using a C++ plugin written for Moray 3.5 back in 2005. In those days $300 was a reasonable price for software to create these kind of simulations. Moray needed several plugins to generate the mesh, import the mesh data, and draw the struts. Now we can generate many custom dome designs in just a few minutes using the free and open-source Blender 3D.
Let's make a dome
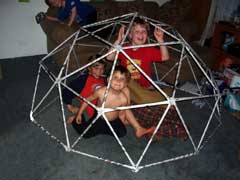
A great project for kids is to make a dome out of rolled newspapers and tape. My nephews really enjoyed the one we built, but it didn't last very long. The shape uses only two strut lengths, 1 and .8844. I prefer the English foot because of the way it divides into nautical miles, degrees, and seconds of arc, but a meter stick works very well for projects like these...
We of course do not need to adhere to these dimensions for our newspaper dome. We could build something vaguely geometric in Blender and warp and stretch it to the dimensions we want. We can then have it display the line dimensions for us, so all we have to do is roll and cut.
- Start Blender
- Press Del to delete the cube
- Shift-A to add Icosphere
- Choose the number of subdivisions from the menu at left
- Stretch and transform as desired
- Go to edit mode and remove excess virtices
- Right-click on the Icosphere
- Press Tab to enter edit mode
- Press Z to switch to wire frame view
- Press B for box select tool
- Press 1 on the numpad (front view)
- Select the bottom virtices
- Press Del to delete them
- Show edge lengths
- While still in edit mode
- Press N and scroll down to Mesh Display
- Click Length checkbox
- You should see strut lengths like the picture at right
Thank you for visiting. I hope you found this information informative and useful. Pease bookmark this site and check back often to see new and interesting offers from our sponsors.
 Copyright © 2026 Henry Kroll III, thenerdshow.com This web page is licensed under a Creative Commons Attribution-ShareAlike 3.0 Unported License.
