Solar Cooker Projects
 We recently built a solar cooker and tried it out. The initial design worked better than expected. It made a warm meal, and heated dish water in spite of partially-cloudy weather. If used 50% of the time, a solar cooker could save us an estimated $50 annually in stove fuel.
New Design
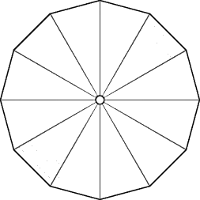
 Based on the above experience we used the free and open-source Blender 3D to create a new printable design template and scaled it to fit a single sheet of paper. We engineered the new solar cooker so the focal point is even with the rim to make it easy to locate.
Click the image at left to download the printable template.
The documents used to create the template are also available for download under a Creative Commons license. They may be re-published, but publishers must give credit and provide a link to this page, so search engines can find the original author. Get the zip file bundle.Things We Will Need
To build the solar cooker, we need:
- 25' roll of aluminum foil
- large cardboard box
- hot glue, or paste
- printer and paper for template
- the downloadable template
Let's Build a Solar Cooker
 Start by printing out the template, preferably on some heavy cardstock or overhead transparency film. Ordinary 8-1/2" x 11" letter-size paper will also work. For larger units, take the graphic at right and scale it up!
Cut out the template along the outline and tape it together where it says "tape here". Make sure it's even, and not crooked at the seam. It should look like a curved triangle when done, sort of like the picture.
Put the template down on a piece of cardboard and draw or trace around the outline. 

Use a box cutter or large scissors to cut out 12 identical wedges of cardboard. Line them up together on edge and trim off any excess.
Press the aluminum foil down on each piece to make a mark. Cut the foil to size. Glue foil to the front of each of the 12 cardboard wedges.
Glue or tape the 12 sections together, bending the cardboard sections as they go.
This is where we get creative. A wood and metal frame, fork, or grill may be crafted similar to the image near the top of the page. It needs to be metal (or something able to withstand heat) at the focal point and sturdy enough to hold a pot without tipping over. Alternatively, the solar cooker may be leaned up against a wall or cooler and a cooking pot or kettle may be suspended from a tripod or plant hanger with some wire.
Conclusions
Here are some further ideas from trying it out and thinking about it. For best results the cooking pot should be black in color. An iron cooking pot or dutch oven ought to work great. The shape and quality of dish construction is NOT critical. The target area for a kettle is large enough to be forgiving. It can have wrinkles in the foil and that's fine.
Kids can make these. Hot glue, duct tape, paste, or paper mache could hold it together. Wheat paste would work with some strips of paper. We glued the foil down with beads of hot glue, but it could be done better with some paste or spray adhesive applied evenly to the surface. Make it too perfect and it could burn somebody! The roll of aluminum foil originally came from the dollar store. It costs $1. The foil had gotten wet and ruined, so the whole project was arguably free. It might cost something if there isn't any glue, wheat flour, leftover rice, stale pasta, or anything that can be made into a paste.
Solar Camp Stove
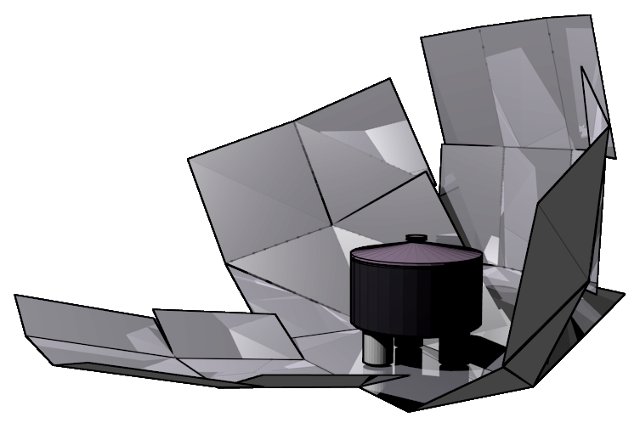
This design has not been tested, but we created a solar camp stove from a cardboard box, based on our above experience with solar cookers. The need for something a little larger and more powerful, yet somehow more portable, and easier to assemble has yielded this prototype sketch.
Choose a cardboard box that is roughly twice as large as the cooking pot. A standard 20" postal shipping box should do the trick. It ought to be half as tall as it is wide, but perhaps that doesn't matter.
Cut, fold open the cardboard box, and glue foil to the inside surfaces. Now fold it as shown, and form it into a parabolic shape. Press grooves with a ruler or straight edge for better folds. Place cook pot on 3 empty tin cans, rocks, blocks, or whatever to get the appropriate height. Get some extra material for bracing. Put poles in the ground, or lean it up against something, and stack stuff around it. Use the sun to align the panels and fix them in place with duct tape. This is all experimental, but since it's made out of a box at least we can fold up and take it camping, stick it behind the seat, in the closet, or tape it back into a box when done. Since it is foil-lined it could even be crammed inside another, slightly-larger box to keep food warm.
If anybody builds these projects we would appreciate some feedback, and pictures!


We modeled this solar camp stove design concept sketch, again using the free and open-source Blender 3D.
Thanks for visiting! We hope this information is informative and useful. Pease bookmark this site and check back often to see new and interesting offers from our sponsors.
 Copyright © 2025 Henry Kroll III, thenerdshow.com This web page is licensed under a Creative Commons Attribution-ShareAlike 3.0 Unported License.